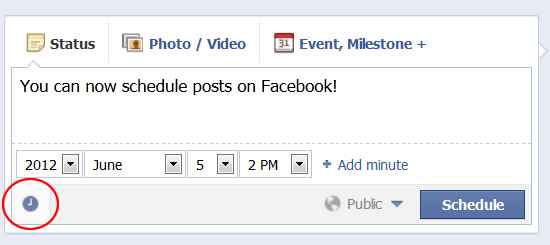
First, click in the box where you will be typing your post. At the bottom left corner a little clock appears (circled in the image below). Once you click on the clock you will be able to choose the year, month, day, hour and minute you would like your post to appear. Your ‘Post’ button will change to a ‘Schedule’ button.

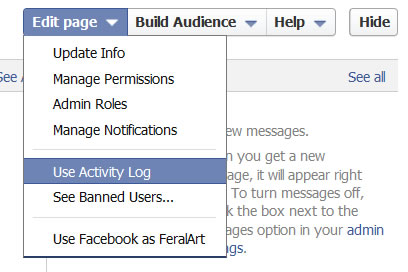
Once you have scheduled your post you will get a message saying when it will be published. If you would like to edit or cancel the post before it appears on your timeline, you can through your admin panel by clicking on ‘Edit Page > Use Activity Log’.

Your scheduled posts will be at the very top of this screen and gives you the option to change the scheduled time, post now or cancel the post.

A few things to note:
- Scheduling does take into account where you are in the world, so if you are posting from Victoria, Australia and ask your post to appear at 2pm, it will appear at 2pm Victoria, Australian time.
- You can only schedule posts up to six months in advance.
----------------
Yes, FeralArt is on Facebook too!
Come join me, and don't forget to introduce yourself: www.facebook.com/FeralArtDesign
nice post for us
ReplyDeleteReading this article is enjoyable due to its creativity and usefulness. Additionally, I have written many articles. As a result of reading this article, I gained an immense amount of knowledge. Thank you so much. You can find information about Free Webcam Test here.
ReplyDelete